


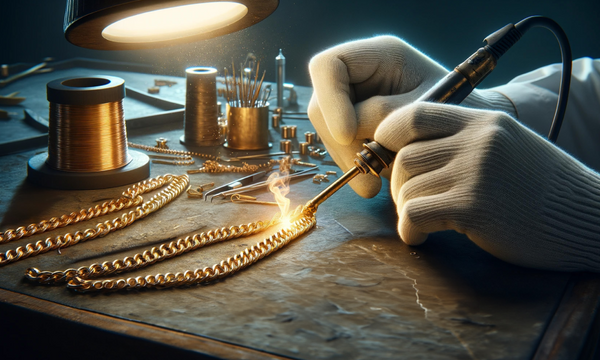
Whether you want to repair your gold chain or simply solder jewelry pieces together, you can either visit a local jeweler or do it yourself. With the right tools and adequate knowledge of how to solder gold chains, you can confidently complete the task without damaging your precious jewelry.
If this is your first time soldering jewelry, here’s a detailed guide on what a gold solder is, what supplies you need for soldering a gold chain, and how to solder gold jewelry at home.
Understanding a Gold Solder
Before we share the steps to solder jewelry, let’s first explain what a gold solder is and how it can be implemented in the soldering or brazing process.
A gold solder is a type of metal alloy that consists of gold and other metals with low melting points, such as silver, zinc, cadmium, indium, and tin. As these metals make the alloy whiter, copper is also added to gold solders to maintain the yellow color.
While these are the main metals that we see in gold solders, the exact composition depends on the desired chemical and physical properties, as well as the specific application.
Basically, gold solders are made in a way that a perfect balance of strength, conductivity, and corrosion resistance is achieved.
The primary purpose of a gold solder is to join gold pieces together in jewelry-making and repair. Besides, gold solders are also commonly used in electronics, due to the high conductivity and corrosion resistance of gold.
When it comes to the types of gold solders, they are available in a few different forms, including solder wires, solder sheets, and solder chips. While gold solder wire is the most convenient type of solder to work with, solder chips and solder sheets also have specific applications in gold chain soldering.
Necessary Tools for Soldering a Gold Chain
You’ll need a couple of tools and materials to solder gold jewelry. Here’s a complete list of the essential supplies needed for soldering a gold chain.
A soldering brick is a special brick designed for high-temperature applications and is used for distributing heat efficiently while keeping the metal heated.
There are a few soldering brick options, including fire brick, charcoal brick, kiln brick, magnesia block, ceramic solder board, and more.
Obviously, you’ll need a gold solder to repair your gold chain. You can choose from a solder wire, solder sheets, and solder chips.
While you can get pre-cut solder chips, you can also cut a solder sheet or solder wire into smaller chips to make the soldering process easier and have full control over the amount of solder being applied to the chain.
You’ll also need a hand torch for melting the solder. Two common precision torch options include butane and oxy-acetylene gas torches.
Flux is a chemical product that can be applied to the metal’s surface for cleaning purposes. It removes all the dirt, grime, and impurities from the gold chain, making the soldering process more straightforward.
Flux is available in a paste, liquid, or powder form. No matter which option you choose, you should ensure that the selected flux is safe for use on gold.
You’ll need a pair of soldering tweezers to hold the gold chain in position during the process. While you can also use a clamp as an alternative, it may damage the chain if you fail to tighten the clamp lightly.
Copper tongs are required to hold the gold chain while submerging it in the acidic pickle solution. Copper is suitable for this process as it won’t corrode in the acidic solution.
Avoid using steel, as it will go through autocatalytic corrosion when reacting with the pickling solution.
A jewelry pickle solution will be needed to clean the oxidized layer off the gold chain.
A pickle is sold either as a powder or a concentrated solution that you dissolve or dilute with water.
Following safety precautions during the gold soldering process is essential. Don’t forget to wear gloves, an apron, and safety goggles to prevent burns or other severe injuries.
How to Solder Your Gold Chain
After gathering the right tools and materials, you should carefully follow the step-by-step instructions to avoid causing additional damage.
Whether you’re repairing a broken gold chain or customizing your jewelry, being gentle, precise, and patient is key to soldering a gold chain effectively.
From preparing your workspace to how to solder gold chains, we walk you through the steps to achieve professional results.
Step 1: Prepare Your Workspace
First things first, prepare your workspace by getting rid of extra items and gathering the required tools within arm’s reach for easy access and efficiency.
Step 2: Clean the Chain in a Pickling Solution
Cleaning your gold chain is an important step. After wiping the chain with a soft cloth, soak it in the pickling solution to thoroughly clean the metal surface. Use a pair of tweezers or copper tongs to hold the chain.
Let the chain soak for 1-2 minutes and then carefully rinse it with some water to remove the remaining acid.
Step 3: Secure the Piece using a Clamp or Tweezer
The next step is to secure the gold chain using a clamp or a pair of tweezers. Make sure the gap between the chain links is as small as possible. Otherwise, the soldered chain may look unprofessional.
Step 4: Add Flux
Flux is used for removing any remaining impurities from the chain and preventing discoloration of the surface. This time, you should apply flux only to the areas that will be soldered.
Step 5: Heat the Flux
Take your jeweler’s torch and gently heat the flux until you see that the water is boiling away. Note that you should leave the protective solids behind. This residue will prevent the formation of copper oxides on the surface of the gold chain.
Step 6: Add a Gold Solder and Apply Heat
Cut a small piece of gold solder wire or use a pre-cut solder chip. Carefully add it to the area that you want to join. Use your hand torch to apply heat while moving it back and forth for even heat distribution across the chain.
You can stop once you see the solder melting and flowing across the seam/gap. At this time, the two sides of the gold chain should be connected.
Step 7: Cool the Gold Chain
After the gold chain has been heated sufficiently for the two sides to join together, turn off the torch and give the chain a couple of minutes to cool down. Then, use tweezers and submerge the chain in a water bath. Keep in mind that the gold chain should be completely cool before you proceed with the next step.
Step 8: Place the Chain in a Pickle Bath
You’ll notice that your soldered chain has some discoloration caused by the fire scale. Don’t freak out, this is totally fine.
Use copper tongs and slowly place the gold chain into the pickle bath. The acidic solution will get rid of the discoloration in just a few minutes.
Step 9: Clean and Polish the Chain
To finalize your gold chain soldering project, rinse the pickle solution off the chain. Take a soft jewelry cloth to polish the chain.
Carefully observe the area that you’ve soldered. There may be some excess solder or fire scale left. If this is the case, consider polishing or filing the spot to achieve the desired appearance.
While this might seem to be a minor adjustment, giving your gold chain smoothness and shine will make it look more professional and eye-catching.
Dive a little deeper into how to clean a gold chain in our article: "How to Clean Gold Chains: A Step-by-step Guide".
Conclusion
Soldering a gold chain is not something you can learn overnight. However, this skill can be mastered with some practice, precision, and patience.
Whether you’ve decided to repair or customize your gold jewelry, knowing how to solder gold chains and selecting the right materials will help you achieve the goal with confidence.
Don’t forget to prioritize your safety by wearing protective gear, including goggles, gloves, and an apron. Additionally, ensure that you work in a well-ventilated area, as harmful fumes and gases produced while heating flux and solder can irritate your respiratory system.